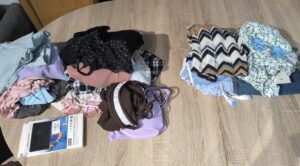
It seems like almost every time I’m all set to write a Needs vs Wants post, something comes up and ruins my plans, like a power outage that stops me from using my computer. Today, we had the strangest thing. All over my village, there were no telephone lines and no internet, so my post went unwritten. Instead, I buckled down and sewed myself a bunch more Mama Cloths, so I can make a little tutorial to show you how to make your own.
Mama cloth (washable menstrual pads) is a great alternative to disposable maxi pads. They’re greener, more comfortable, less likely to cause you irritation and chafing, and if you make your own, they’re loads cheaper! It is said that when using mama cloth instead of absorbency chemical filled disposable pads, you get shorter, lighter, less painful periods, but I can’t vouch for that 100%. I do know that it certainly felt that way, but it could have been a placebo effect.
Homemade Mama Cloth
Making your own reusable pads is very simple and easy. Even the novice sewer can do this, as can someone with no sewing machine. When I first switched to cloth, I had no use of a machine, so sewed all mine by hand. It was a little bit more time consuming, but those pads work well till this day.
This is my first time making a tutorial that doesn’t involve food, so please bear with me if I make any mistakes.
Materials Used
Fleece
Flannel
Pul or other types of water proof fabric (optional)
Microfiber cloths (optional)
Snaps (optional)
Thread
Equipment Needed
Needle
Pins
Sewing machine (optional)
Marker
Paper
Instructions
1. Take out a paper and cut out a funky little shape. You want this shape to be as long as you like your pads to be. The exact shape isn’t so important, so long as you make it wide enough to cover the inside of your underwear where your pads usually sit.
I usually make my shape like this:
.JPG)
2. Put that paper on your fleece or flannel and trace it with a marker. If you drew the paper the exact size that you want your pad to be, add another inch around the edges when you’re tracing the pattern because you’ll be hemming your pad at some point and it will end up much smaller than your original piece of fabric.
3. Cut out your shape. This will be the top of your pad. We’ll call it Piece A.
.JPG)
4. Take your cut material (Piece A)and lay it down again on your uncut fabric. You want to now make the bottom of the pad. We’ll be making a pocket pad that you can stuff with absorbent materials, so you’ll need to make two overlapping pieces at the bottom. Ok, those instructions make no sense without pictures, so here they come.
You’ll want to cut two pieces of fabric (Pieces B and C), each three quarters the area of your original piece. Still make no sense? Look at that crudely made computer drawn red line in the above picture. That is roughly where I had outlined the pad on the material with my marker. I wanted a piece that was the same shape and size as the original, but only half as wide… plus a little bit. (If I only make it half as wide, the pieces of the pocket wouldn’t overlap like I need them to.)
Now make a second one.
If that still made no sense, here is a picture of what I traced before cutting it out.
You see what I mean now? Pieces B and C are each 2/3 of the area of the original pad (Piece A) and are mirror images of each other.
5. Now cut them out.
Now we’ve got three pieces of fabric. These two, and don’t forget your original, Piece A.
Pieces B and C will lie on top of Piece A, overlapping each other to form a pocket.
But first, we need to make wings to hold the pad into place on your undies. (No sticky adhesive to do the job; wings are necessary for mama cloth.)
6. Cut out wings to hold your pad. This isn’t a science; cut out your winds to look like whatever you want. I make mine roughly the size and shape of a thumb.
.JPG) |
| Ok, maybe a drop wider than a thumb. |
The only important thing to remember with the tabs is that they need to be long enough to meet.
When I lay the tabs, going from the sides of the pad towards the middle, you’ll see that they both reach most of the way across the pad. This is important, because, as you see below, they need to be able to overlap so you can close them.
7. Put it together.
Take Piece A. Put the wing tabs on it, looking like this. The wing tabs should be overlapping.
Then put Piece B on top of Piece A, partially covering the wing tabs.
Make sense?
Now put Piece C on top of Piece A and overlapping Piece B, covering the wing tabs the rest of the way.
8. Pin it together. Using straight pins, go around the edges of the pad securing the pieces together. Make sure that you get the wings held in place (but make sure you’re not pinning down both sides of the same wing or you might be in trouble) so they don’t float around.
9. Now sew. Either with a machine or by hand, sew around the edges of the pad. Leave as small of a hem as possible, otherwise your pad will end up being too small.
.JPG) |
| This picture doesn’t want to align to the left. Oh well. |
10. Your sewn pad. Take out the pins.
Now flip it inside out.
Here’s the top.
And the bottom. Note the pocket. This is where you’ll be stuffing the pad from.
11. At this point, you can use the pad. To use, stuff, then put on your underwear. Secure by attaching the wings to each other under your underwear with a small safety pin.
Alternatively, you can sew a snap on to the wings to allow it to be secured more easily.
Here it is with a snap sewn on. This is what the pad will look like from the bottom.
11. Stuffing the pad.
The pad can be used as is in place of a panty liner.
The rest of the time, you should stuff the pad.
To stuff, open the pocket and insert absorbent material, then close the pocket over the material. Put the pad on your underwear pocket facing down, and secure.
Stuff your pad with one of the following:
- A piece of absorbent material, folded over a few times to form a rectangle. Materials used can be flannel, cotton, parts of old tee-shirts, or even an old towel or rag.
- A microfiber cloth, folded into a rectangle.
- A diaper doubler. I’ve got so many unused ones lying around that this is my go-to for pads.
- A waterproof layer. This is only really necessary on heavy flow days. Cut a piece of waterproof material (like pul) a little smaller than your pad. First stuff the pad and then put this in last, making sure that no blood leaks on to your underwear.
Notes
These should be washed on cold as hot sets blood stains.
Hydrogen peroxide will take off the blood easily.
Line dry these.
Take the pad apart to dry quicker.
This can be made with flannel instead of fleece. I find fleece to be easier to work with as it doesn’t fray and is more absorbent and wicks moisture away from your skin, but many prefer to use flannel.
P.S. To be completely honest, this was one of the hardest posts I’ve ever written. I know exactly what I’m doing when it comes to sewing this, but putting it into words, even with the help of pictures, was really, really difficult. I hope it was relatively understandable. I don’t mind clarifying anything if you’ve got any questions.
So… do you use cloth pads? If so, do you make your own or buy them? If you use cloth pads, do you also cloth diaper? Do you think the two go hand in hand?
If you don’t use cloth pads, would you ever do so? Or does the thought make you uncomfortable? (As always, you can say feel free to state your opinion, even if you don’t like an idea without using condescending words like “nasty”, “gross”, etc.)
Were these instructions even relatively understandable?

.JPG)
.JPG)
.JPG)

.JPG)
.JPG)
.JPG)
.JPG)
.JPG)
.JPG)
.JPG)
.JPG)
.JPG)
.JPG)
.JPG)
.JPG)
.JPG)


0 Responses
I have just started making these for schoolgirls in my area of rural Zimbabwe – many of them miss school every month as they have only a few rags to do the job. I have been donated some fabric, so am experimenting with different styles – I need them to be as quickand easy to make as possible, as once I've got a style that works I will teach some of the girls to make them. Thank you for this quick and easy tutorial.